Christmas Mini Icons Embroidery
A Designer’s First Glance: Tiny, Tidy, and Thoughtfully Themed
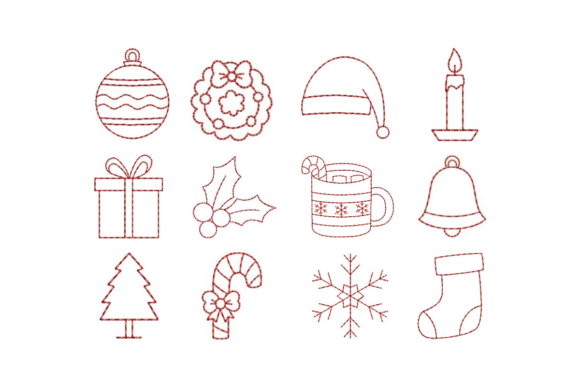
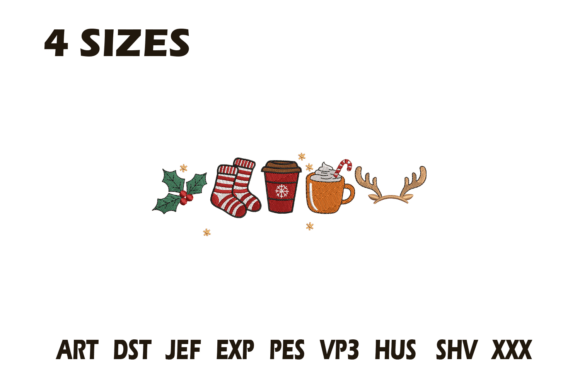
When I opened Christmas Mini Icons Embroidery, my first thought wasn’t “cute”—it was “curated.” These aren’t scattered holiday doodles; they’re a tight, intentional set of miniature motifs—think holly sprigs, tiny stockings, minimalist trees, candy canes with clean curves, and delicate stars—all sized to sit comfortably within a 2.5”–3” hoop. The layout feels balanced, not crowded. There’s breathing room between elements, and the stitch paths suggest thoughtful digitizing: no awkward jumps, no over-stuffed corners. It reads as a cohesive machine embroidery design, not just a collection of clipart scaled down.
Where It Shines: Real Projects, Real Customers
Last week, I used Christmas Mini Icons Embroidery on a set of organic cotton tea towels for a local boutique. We placed one icon—just the star—in the lower right corner, 1.75” tall. The result? Crisp, confident, and quietly festive. No visual noise. Customers noticed it immediately—not because it shouted, but because it looked *intentional*. That’s the quiet power of this design: it elevates without overwhelming.
It works beautifully on custom apparel where subtlety wins—like a single snowflake on the chest of a charcoal sweatshirt, or a tiny wreath above a baby onesie’s pocket. As an embroidered patch, it holds up cleanly when heat-applied to denim jackets or canvas totes. And for Etsy sellers or small shop products, it adds that handmade polish to kitchen linens, linen pillow covers, and even minimalist holiday gift tags stitched onto twine-wrapped packages.
I also tested it on a curved surface—a structured cotton cap—and chose the simplest icon (the bell). With light tear-away stabilizer and reduced top tension, it stayed flat and legible. That tells me Christmas Mini Icons Embroidery is built for versatility, not just flat fabric.
Where to Pause—and Why
This isn’t a one-size-fits-all solution. On stretchy fabric like jersey knits, I recommend testing the smallest icon first—even at 1.5”, fine details like berry stems or thin holly veins can blur if stabilizer choice or hooping isn’t precise. Likewise, on dark fabric, avoid light thread unless you’ve layered stabilizer underneath; fill stitches need enough density to prevent shadowing. And while the stitch density feels moderate overall, the satin-stitched outlines on some icons (like the candy cane) benefit from a sharp needle and tightly wound bobbin thread—especially on textured fabrics like terry cloth or bouclé.
Don’t force it into ultra-tiny spaces. Below 1.25”, the running-stitch accents start to merge, and the sense of “icon” gives way to “blob.” If you’re designing for baby embroidery or personalized gifts where scale matters (think onesies or bibs), stick to the larger end of its natural range—or choose just one icon instead of clustering several.
What It Does for Your Brand—and Your Buyers
Christmas Mini Icons Embroidery subtly shifts how customers perceive your handmade product. It signals care—not just in stitching, but in curation. When someone sees that tiny, perfectly aligned tree on a linen apron, they don’t think “mass-produced.” They think “designed.” That builds customer trust, especially for creative entrepreneurs selling on Etsy or at craft fairs. It also strengthens brand consistency: use the same icon across a line of holiday kitchen towels and matching oven mitts, and your collection feels unified, not pieced together.
And yes—it boosts giftability. A tote bag with a single, elegant stocking icon reads as special, not seasonal clutter. It’s memorable without being loud. That kind of restraint is rare in holiday digital embroidery files, and it makes your finished product feel more valuable—even before pricing.
Designer Notes You’ll Actually Use
- Always test first—not just on scrap fabric, but on the *exact* fabric + stabilizer combo you’ll use for the final embroidery project.
- Check thread color contrast carefully. What reads clearly on white may vanish on oatmeal linen—run a quick black-and-white mockup to verify legibility.
- Review stitch density in your embroidery software. If fill areas look sparse on screen, they’ll read as weak on fabric—especially on napped or fuzzy textiles.
- Confirm hoop size before digitizing variations. Some icons are optimized for 4x4 hoops; others may require 5x7 for comfortable spacing in grouped layouts.
- Inspect small details at 200% zoom: look for stray jump stitches near corners, overlapping satin edges, or under-digitized curves.
- Use proper stabilizer—light cutaway for stable wovens, medium tear-away for knits, and optional topping for nubby textures.
- Verify licensing before selling finished items or bundling Christmas Mini Icons Embroidery into your own design assets. Commercial use rights aren’t automatic—even with “high-quality digital embroidery design” phrasing.
Final Thought: Less Is More—Especially at Christmas
In a season full of bold prints and glittery overload, Christmas Mini Icons Embroidery offers something rare: quiet confidence. It doesn’t try to be everything. It’s precise, purpose-built, and ready to serve real projects—not just Pinterest boards. Whether you’re stitching holiday personalized gifts, building a craft business inventory, or refining your commercial embroidery offerings, this file earns its place in your library by doing one thing exceptionally well: making small moments feel meaningful.